Implementation
Architecture
To understand how Physical Bits works we need to start by looking at its architecture.
Physical Bits is composed of three distinct components:
- The IDE: A web based application that serves as a graphical user interface for the entire system.
- The middleware: A set of tools that allow to compile programs and communicate with the robot.
- The firmware: A program running on the robot responsible for executing the user programs as well as communicating with the middleware.

This architecture has several benefits. On the one hand it is flexible. The IDE, being a web app, could be used from any device with a web browser, such as a laptop or a mobile phone. It could be installed as a native app or accessed through a web browser. Both the middleware and the firmware are portable: although the only implementation of the latter currently supports Arduino boards, the code could be ported to other types of robots with minimal changes to the middleware and IDE. It is fast: compiling, verifying, and uploading programs using the Physical Bits IDE takes a fraction of the time required to compile an Arduino sketch, mostly because of the small size of the programs. And finally, the communication to the robot can be done wirelessly either using bluetooth or a network socket (although the current implementation has only been tested using a USB cable).
IDE
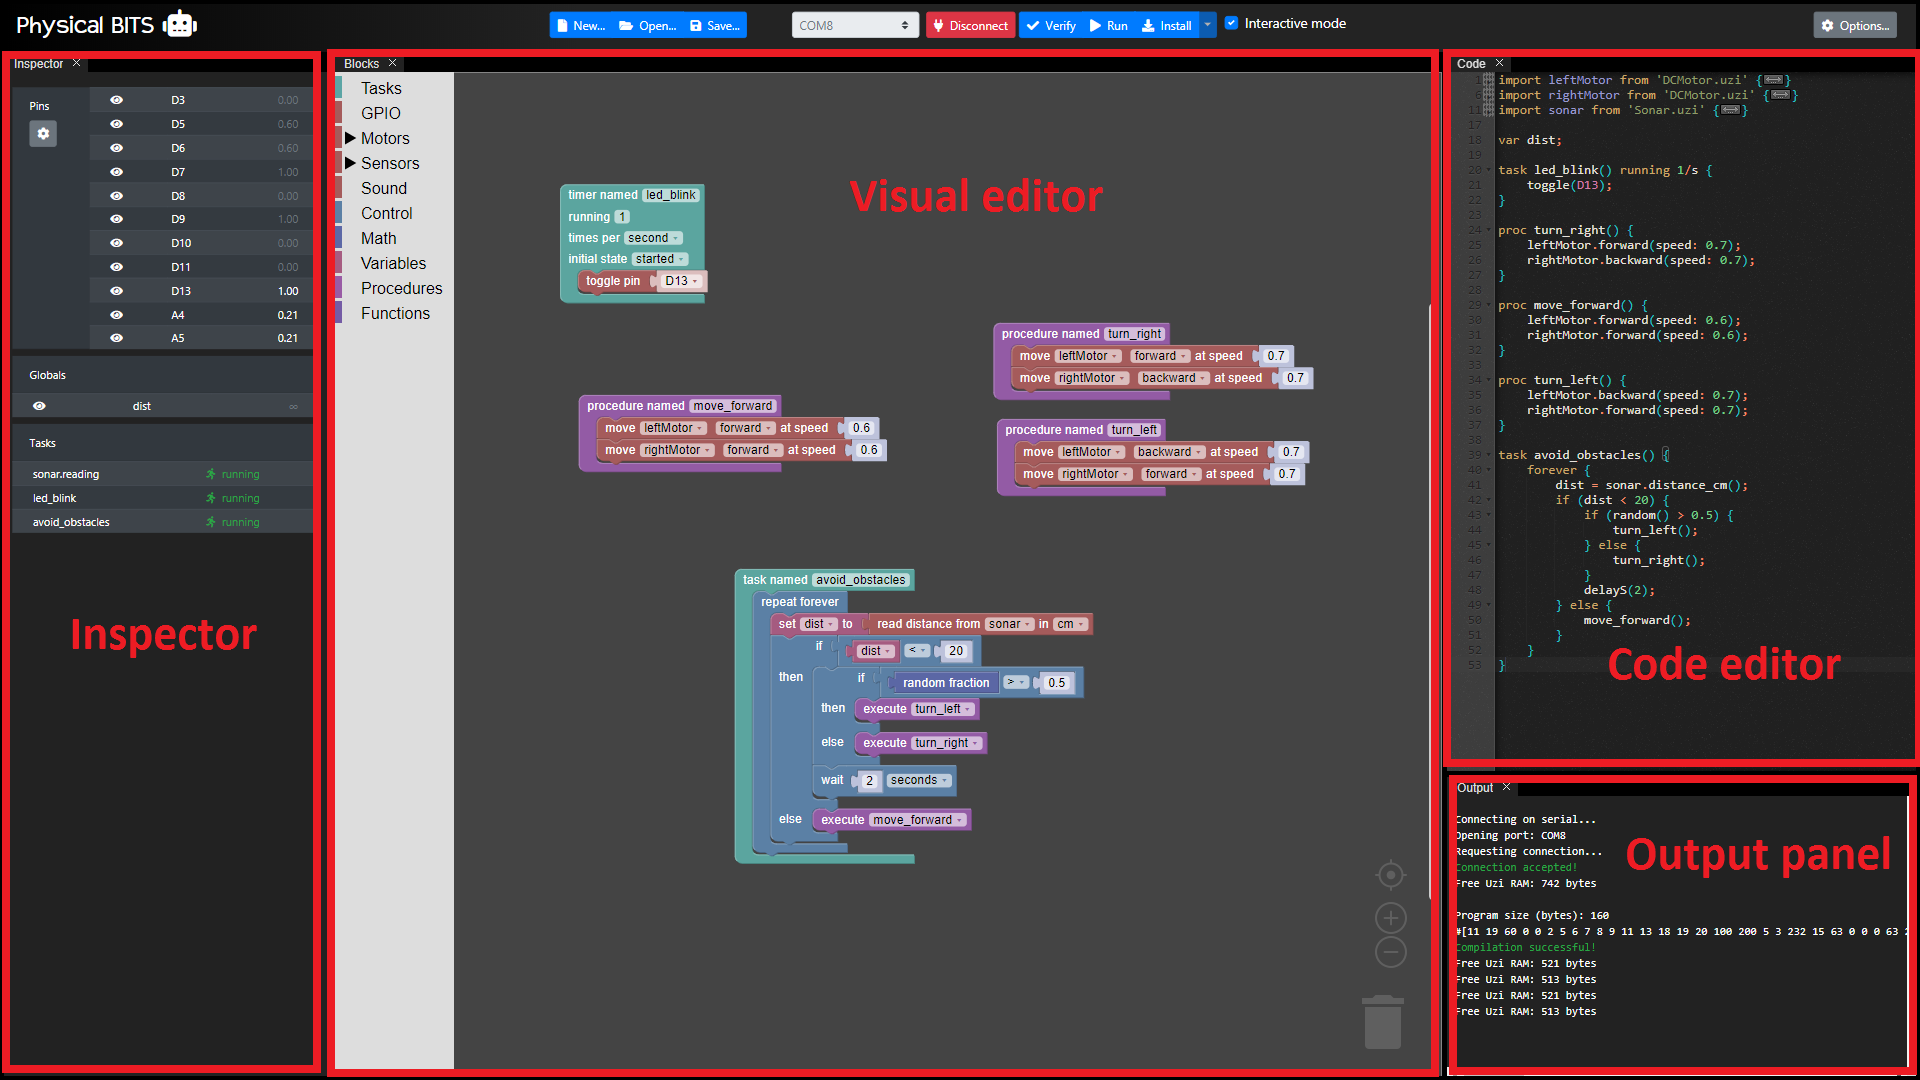
The IDE presents a graphical user interface for the different tools provided by the system, including:
- An editor that allows to build programs by snapping blocks together.
- A code editor that allows to write programs using a custom programming language for robotics.
- An inspector that allows to monitor the state of the device pins, the currently running tasks, and the values of the program variables.
- An output console that notifies the user of any messages
- (COMING SOON) A debugger that helps the user fix programming errors by allowing to pause and execute the program step-by-step.
Blocks-based language
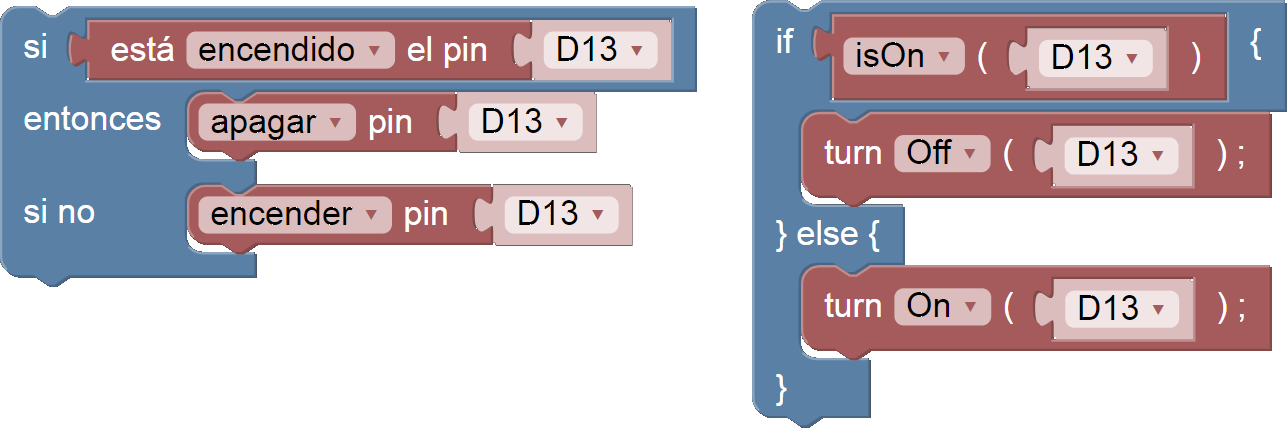
For the blocks-based programming language we decided to take advantage of the Blockly library. The language was designed to provide both a gentle introduction to programming and a smooth transition to text-based languages. Apart from allowing the student to work on his programs using either the blocks or the code editor (or both at the same time), we also added an option to display the text of the blocks using code instead of natural language (as suggested here). When this option is enabled the student is effectively writing code, but the environment allows him to do it by dragging and dropping blocks.
Text-based language
The text-based programming language (we call it UziScript) was designed to look syntactically like C, which is familiar to most programmers. We added a few special keywords, though.
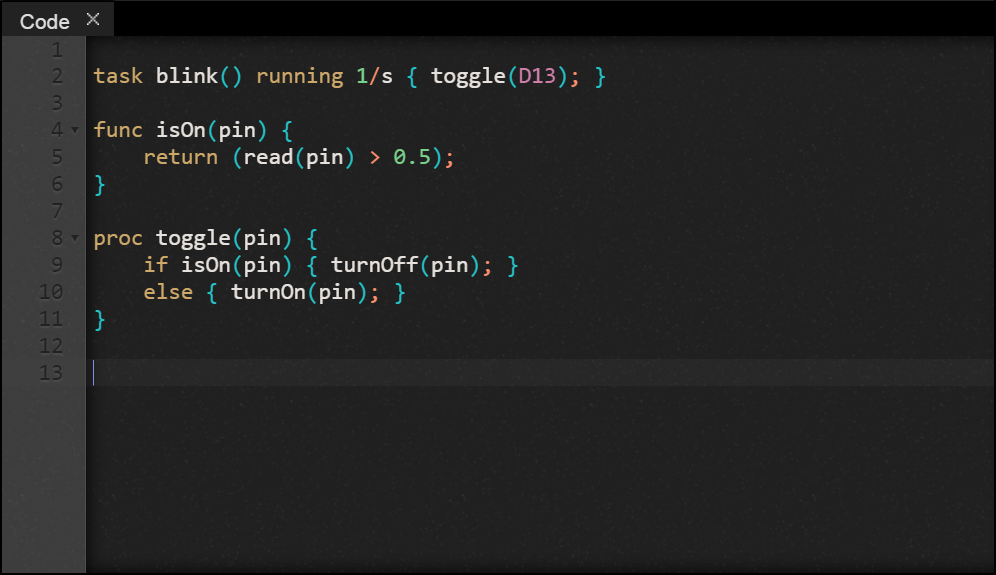
The task keyword has been added to represent behavior that can be executed periodically at a configurable rate. For example, the following code will declare a task that will toggle the LED on pin 13 every second. UziScript does not require any type declarations, so to distinguish a function from a procedure two new keywords are introduced: func and proc.
A program can have any number of tasks, and each task can be defined with a different interval as well as a different starting state, which can be either running or stopped. If no starting state is specified the task will run just once and then it will stop. This is especially useful to initialize variables and can be used as a substitute to the Arduino setup() function.
The execution of each task at the correct time is performed automatically by the virtual machine scheduler but the user can invoke certain primitives to start, stop, pause, or resume a given task. Each task execution is independent, it has its own stack, and it shares memory with other tasks through specially defined global variables. This design allows users to write sequential programs in Arduino's usual style and make them run concurrently without being concerned about the processor scheduling.
Primitive instructions like delay() are provided to allow the user to block the executing task for a given amount of time without affecting the rest. Arduino related primitives are also included but in some cases their names and behavior were modified to offer a simplified interface with the hardware. For example, the Arduino digitalRead() and analogRead() functions are merged into a single primitive function called read(), which accepts a pin number and returns a floating-point value that is always in the [0,1] range. If the pin is digital the resulting value can either be 0 or 1 but if the pin is analog the function will normalize its value between 0 and 1. An equivalent implementation of the write() procedure is also provided. We believe these small design details make the language more accessible to beginners by providing a concise (and consistent) interface to the hardware.
UziScript also supports external libraries that can extend the primitive functionality of the language. You can find examples here.
The UziScript grammar, written as a PEG, can be found here. However, this grammar is not guaranteed to be up to date with the actual implementation.
Middleware
The middleware contains a set of tools that allow to compile, debug, and transmit the programs to the robot through a serial connection. All these tools were originally developed using Squeak, an open source version of Smalltalk. We decided to use Squeak to build the first prototype mainly due to of our love for the language. However, we later ported this code to Clojure for performance and ease of deployment. We also wanted to take advantage of ClojureScript and move part of the compilation process to the browser (this is not fully implemented yet).
In order for the IDE to interact with these tools the middleware exposes a REST API containing endpoints to connect and disconnect from the robot as well as compile, run, and install programs. In order to notify the state of the robot (including sensors, global variables, running tasks, etc.) the middleware uses a websocket connection.
Compiler
The compilation process transforms the user programs into bytecode suitable for the virtual machine to execute. Below is an example of a simple program and its different representations.
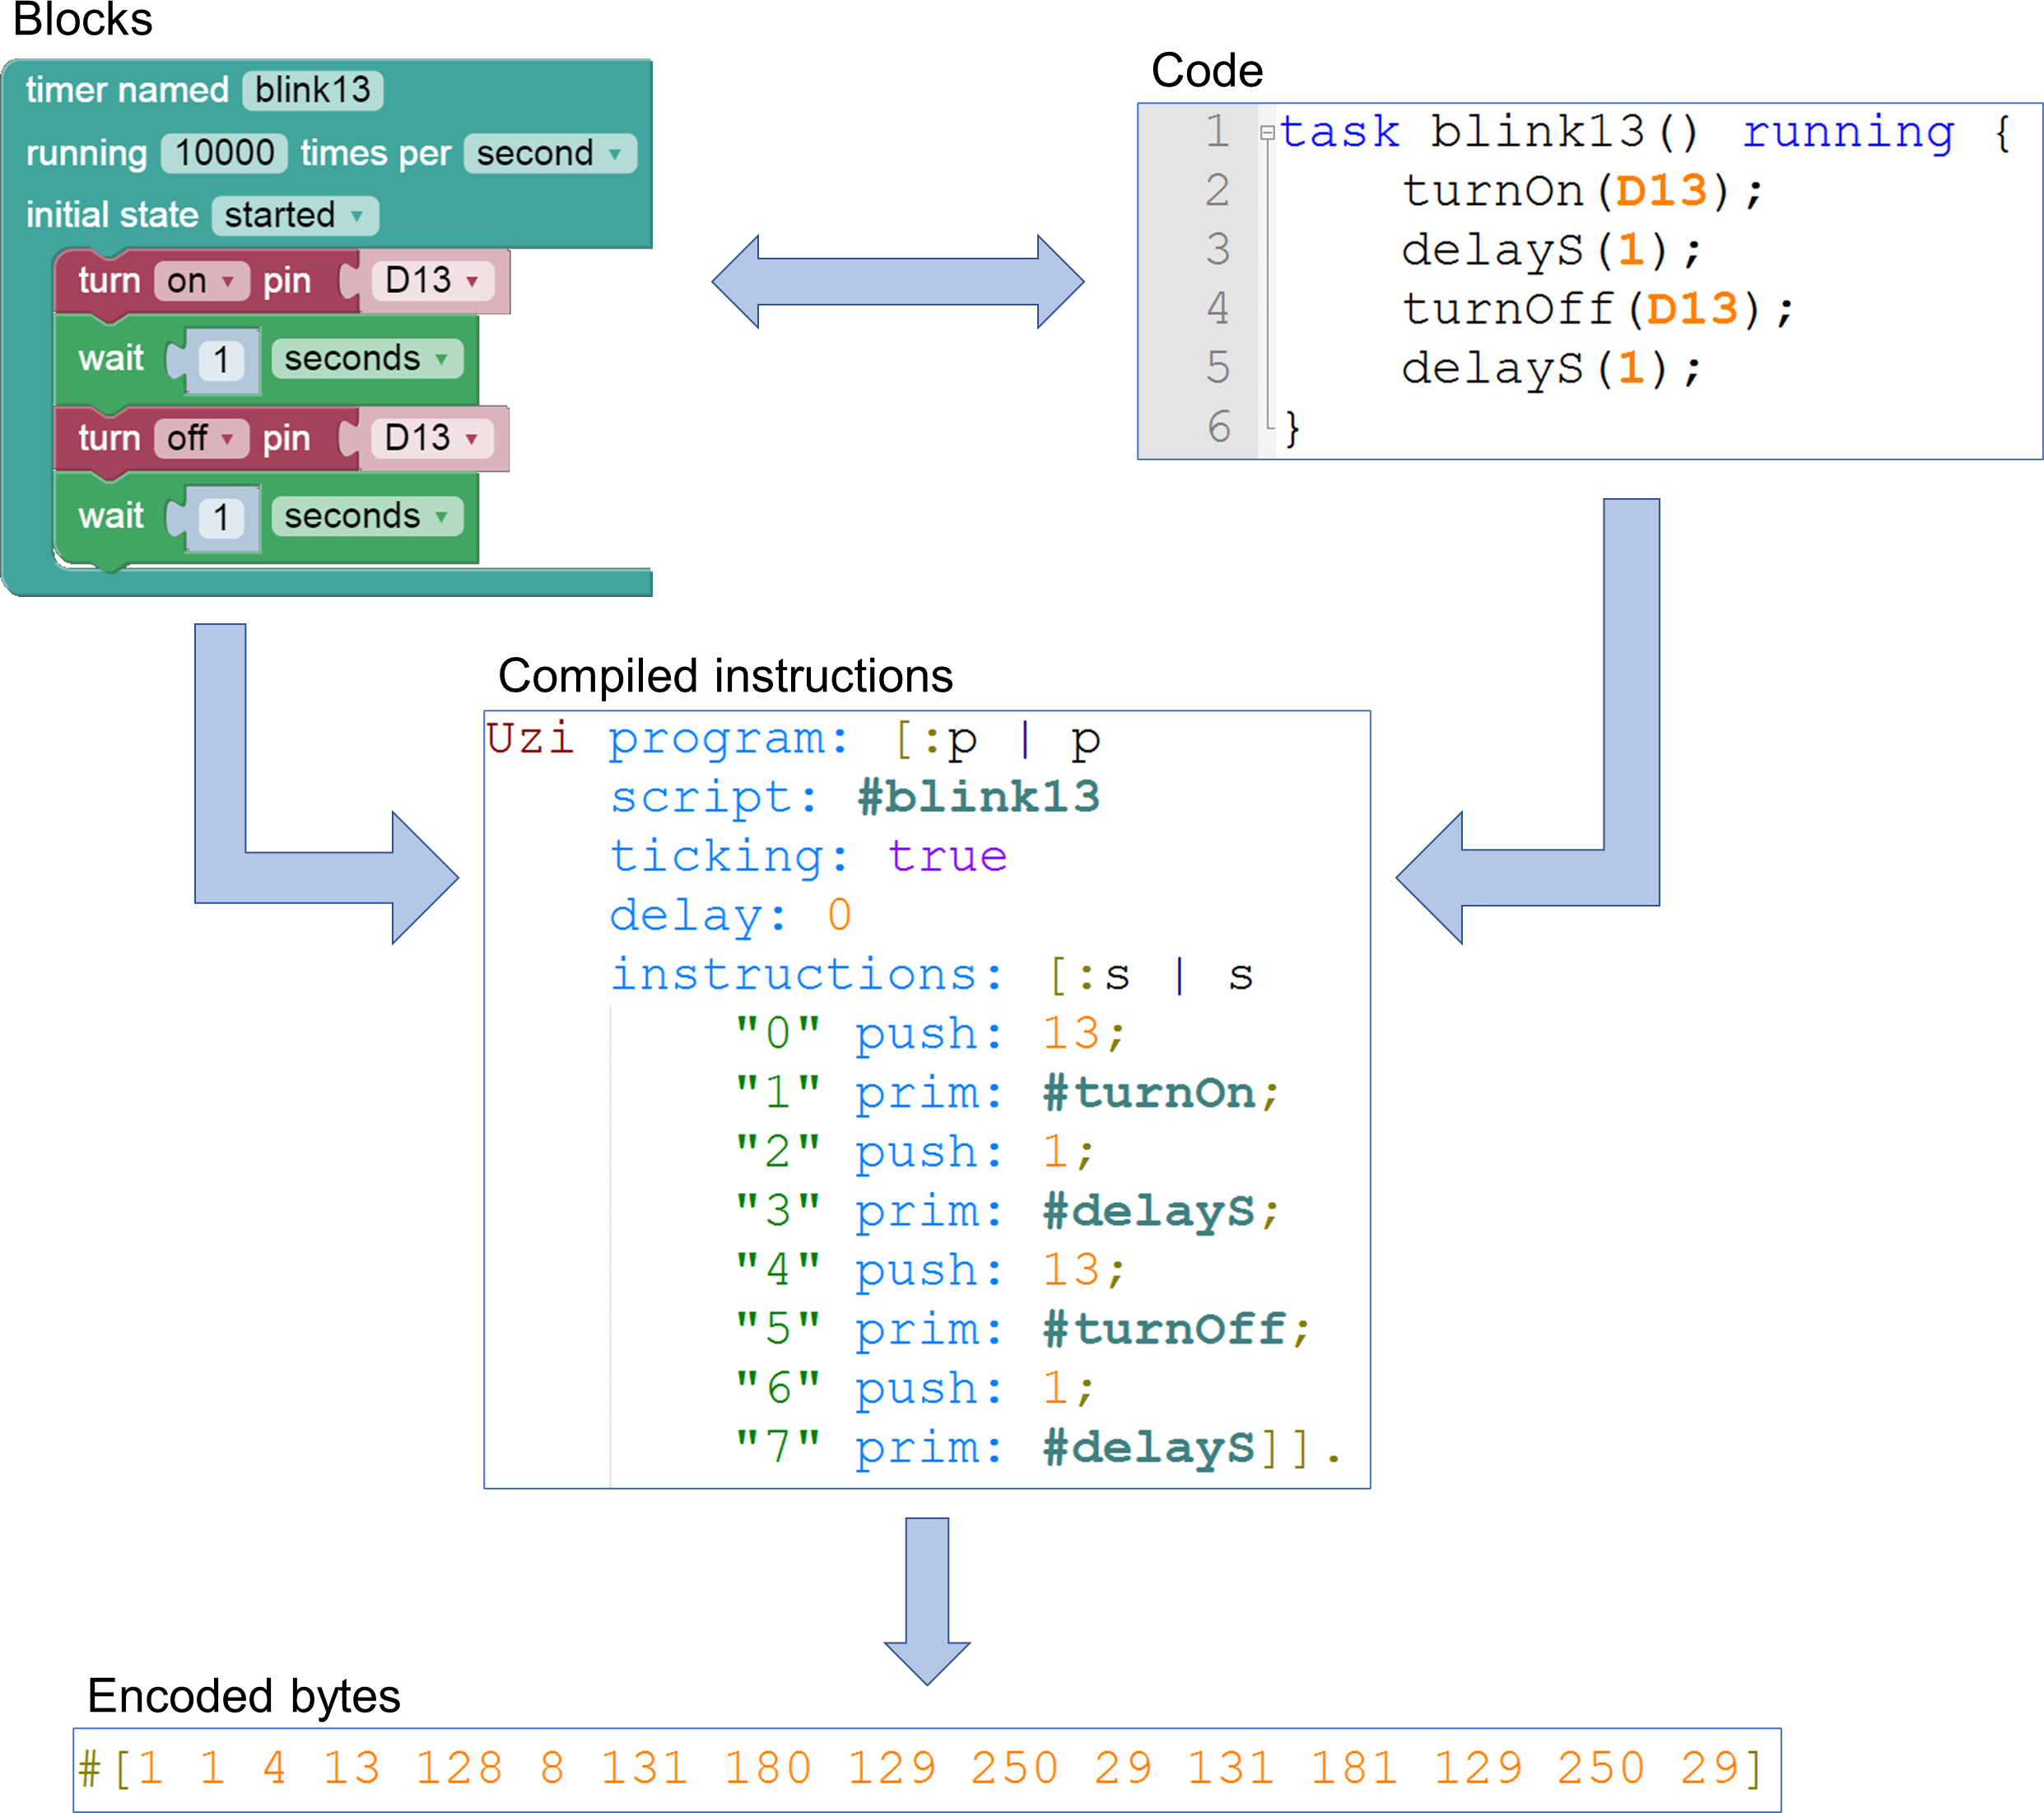
You can find a detailed description of the instruction set here.
Firmware
In order to support both live and autonomous programming, Physical Bits relies on a firmware responsible for executing the user programs as well as communicating with the middleware.
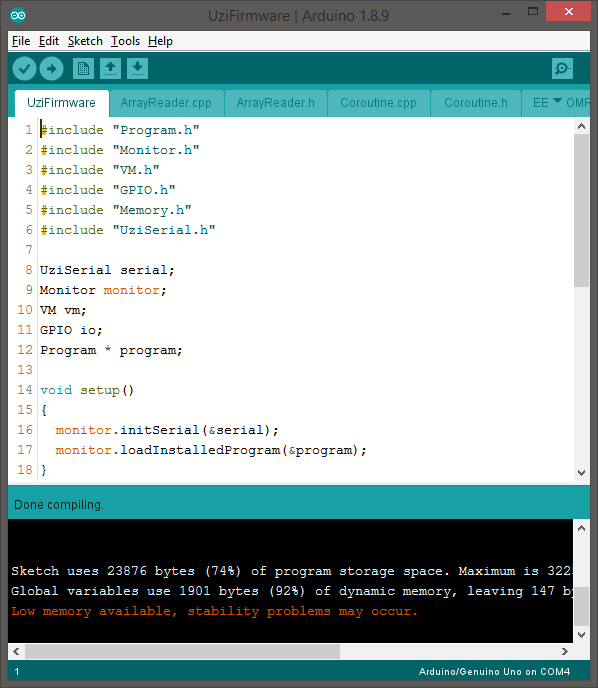
The firmware is just a regular Arduino sketch written in C++ that can be uploaded using the Arduino IDE.
Internally, the firmware implements a stack-based high-level language virtual machine that uses a decode and dispatch bytecode interpreter to execute user programs. This implementation was chosen mainly because of its simplicity. Since the purpose of this language is educational, performance is not currently considered a high priority.
For now, the stack and global variables are the only available memory to the user program. There is no heap or dynamic memory allocation implemented yet. This allows for simpler virtual machine code and compact object code. Almost all the instructions can be encoded using one byte for both the opcode and its arguments and just a few special instructions (such as branches) require an extra byte.
Apart from the virtual machine, the firmware includes a monitor program that allows to interact with a computer through the serial port. Periodically, this monitor program will send the status of the device and receive commands, allowing the host computer to fully control the virtual machine.
By having these two programs running on the robot Physical Bits can provide an live programming experience with a short feedback loop without sacrificing autonomy. Moreover, the monitor program permits the implementation of debugging tools that allow the user to stop the execution of any task, inspect the value of all the variables, explore the call stack, and execute instructions step by step. These kind of debugging capabilities, which we consider to be essential in an educational context, are only available on the Arduino platform using either extra hardware or the more advanced Arduino Zero.
Task scheduler
As most Arduino boards contain a single microcontroller, they can only execute one thread at a time. This means all the tasks defined in the program must share a single processor. The virtual machine, apart from executing the program instructions, is responsible for handling the task scheduling. It decides which task gets executed and when to preemptively interrupt it.
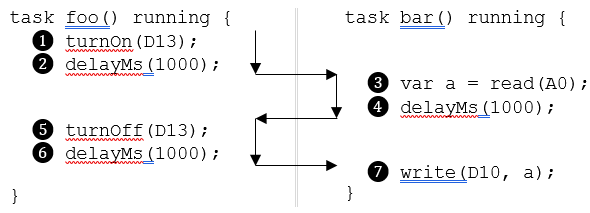
The scheduling strategy is simple, the virtual machine will cycle through the task list scheduling the tasks whose time to run is reached. It will then execute each instruction until a blocking operation occurs, in which case it will interrupt the current task and start executing the next one. Each task will store its execution context (stack, program counter, and frame pointer) in order to be able to later resume the execution from the point where it was interrupted. Some of the blocking operations that will force a context switch include: the yield instruction, all the delay() procedures, a reverse jump, writing to the serial port when the buffer is full, and reading from the serial port when the buffer is empty.
Below is a simplified example of one of the possible ways the scheduler could interleave the execution of the instructions between two tasks.
This strategy has the advantage of being simple (which is important, considering this is an educational project) and it guarantees that all of the tasks will have a chance to run. However, it does not provide any real-time guarantees. In the future, we might improve the implementation by incorporating a real-time scheduler.